We use cookies to make your experience better. To comply with the new e-Privacy directive, we need to ask for your consent to set the cookies. Learn more
Biscornu pin cushion DIY
May 30, 2024
Biscornus: a high-level DIY just for you!


Over the past few years, we have noticed that among you there are many talented individuals, very comfortable with crafts, embroidery, painting, and DIY! Hence your preference for quality and craftsmanship! You have long surpassed the stage of "macaroni necklace" and "mustard jar candle holder"...…
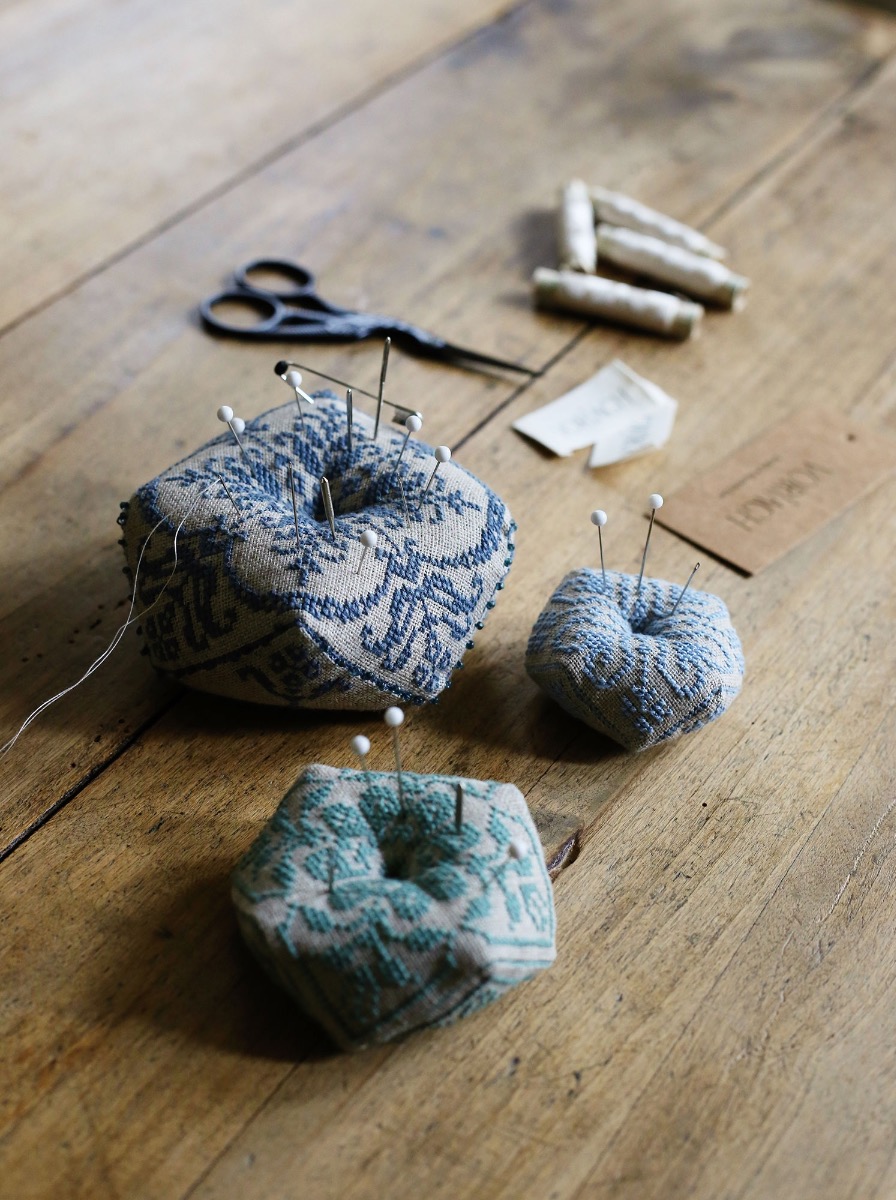
So, we thought of you when we created these embroidered needle cushions. A beautiful way to enhance your daily life as an occasional or professional seamstress with an essential object!
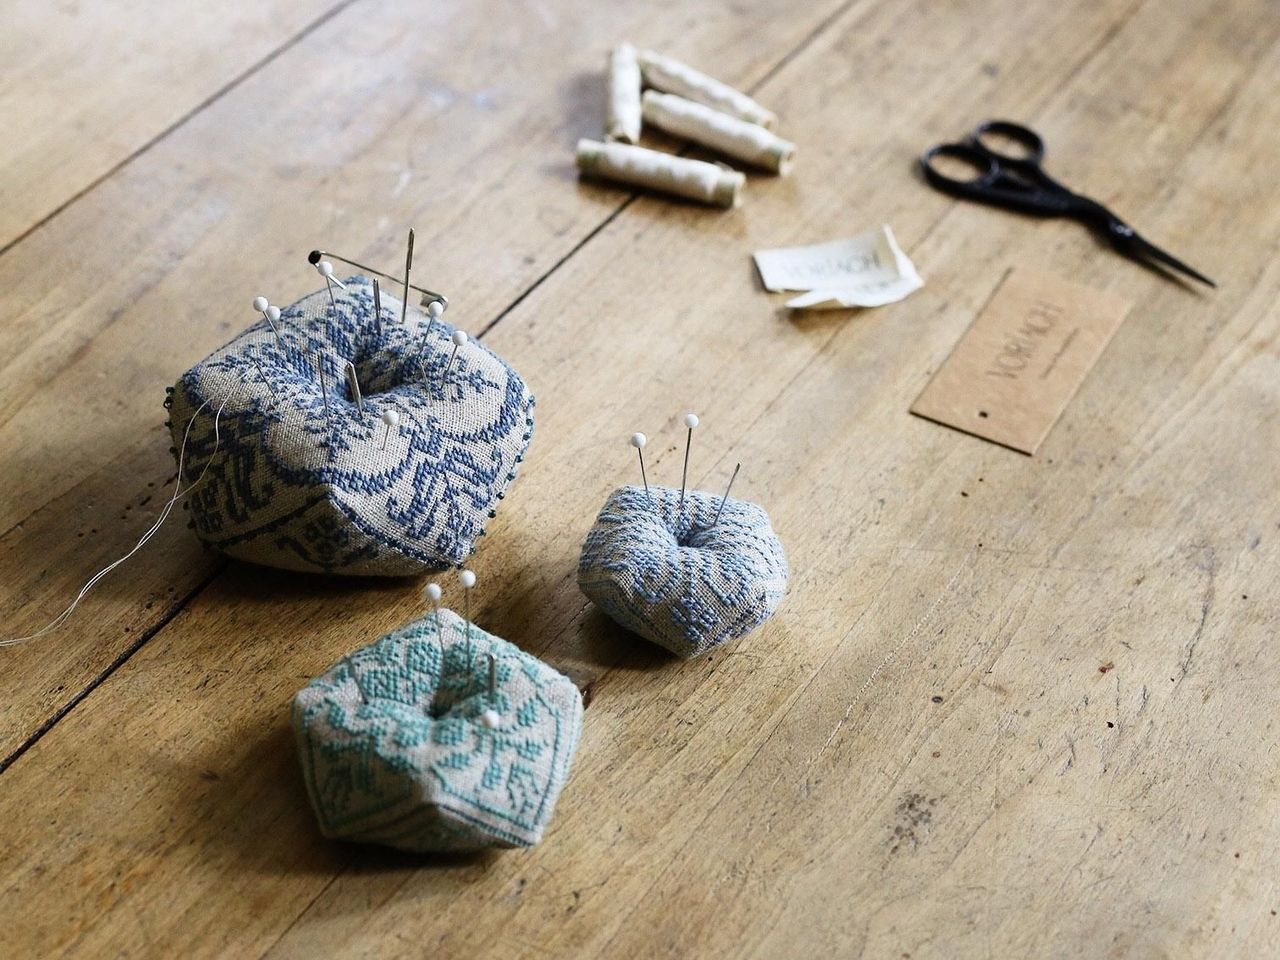
A biscornu, which is a small cushion made of 2 embroidered squares, like a standard cushion, except that it is assembled in a quirky manner, rather than in a square. Here, we decorated it with Ukrainian-style cross-stitch embroidery, monochrome, simple, and elegant.
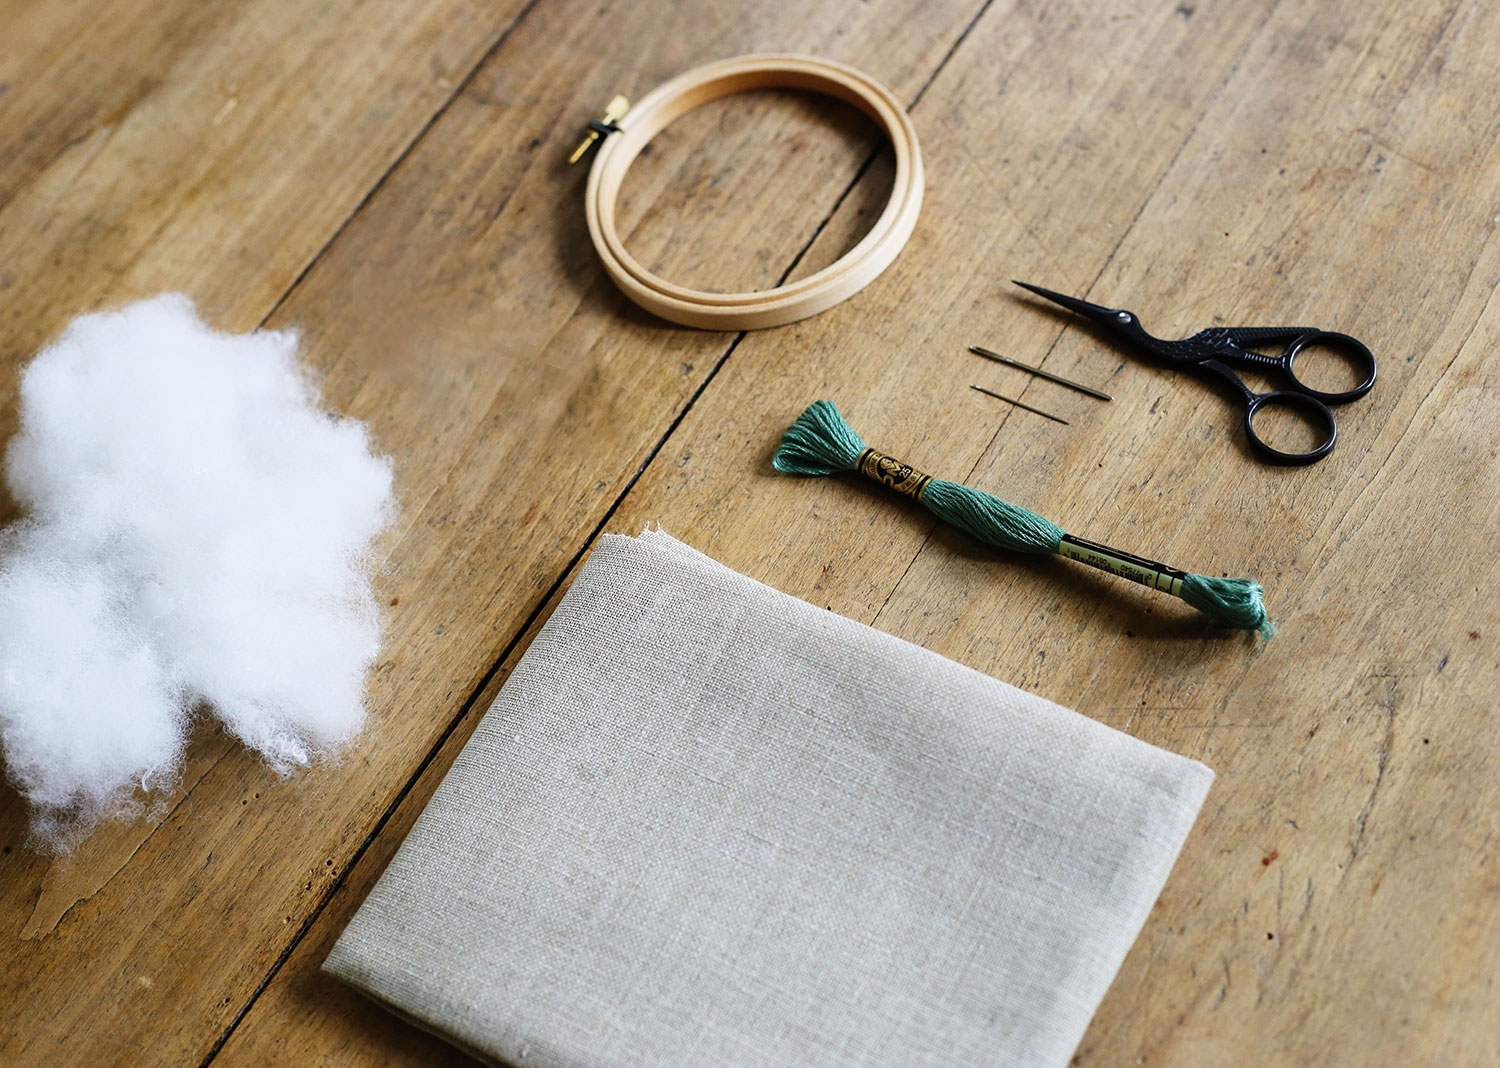
To make this biscornu you will need:
- Natural linen, preferably for embroidery. Here, we chose 12 threads/cm linen;
- A strip of 15cm x 25cm will be more than enough for two cushions;
- One skein of embroidery thread;
- An embroidery needle;
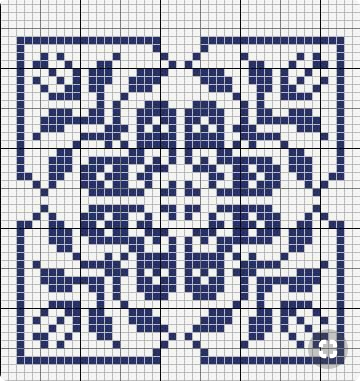
- A grid with a square motif for cross-stitch;
- Filling material;
- Optional: an embroidery hoop, as per your preferences or habits.
Price: 2/5 (between €10 and €15).
Completion time: from 8 to 35 hours, depending on the complexity and size of your embroidery.
Difficulty: 3.5/5.
We found this pattern on Pinterest. By searching, you will find a vast number of free grids available, so you can easily create your own biscornu with your favorite motifs. Try to avoid grids larger than 65 x 65 stitches, as this enlarges the final size of the biscornu and makes the work longer and more difficult.
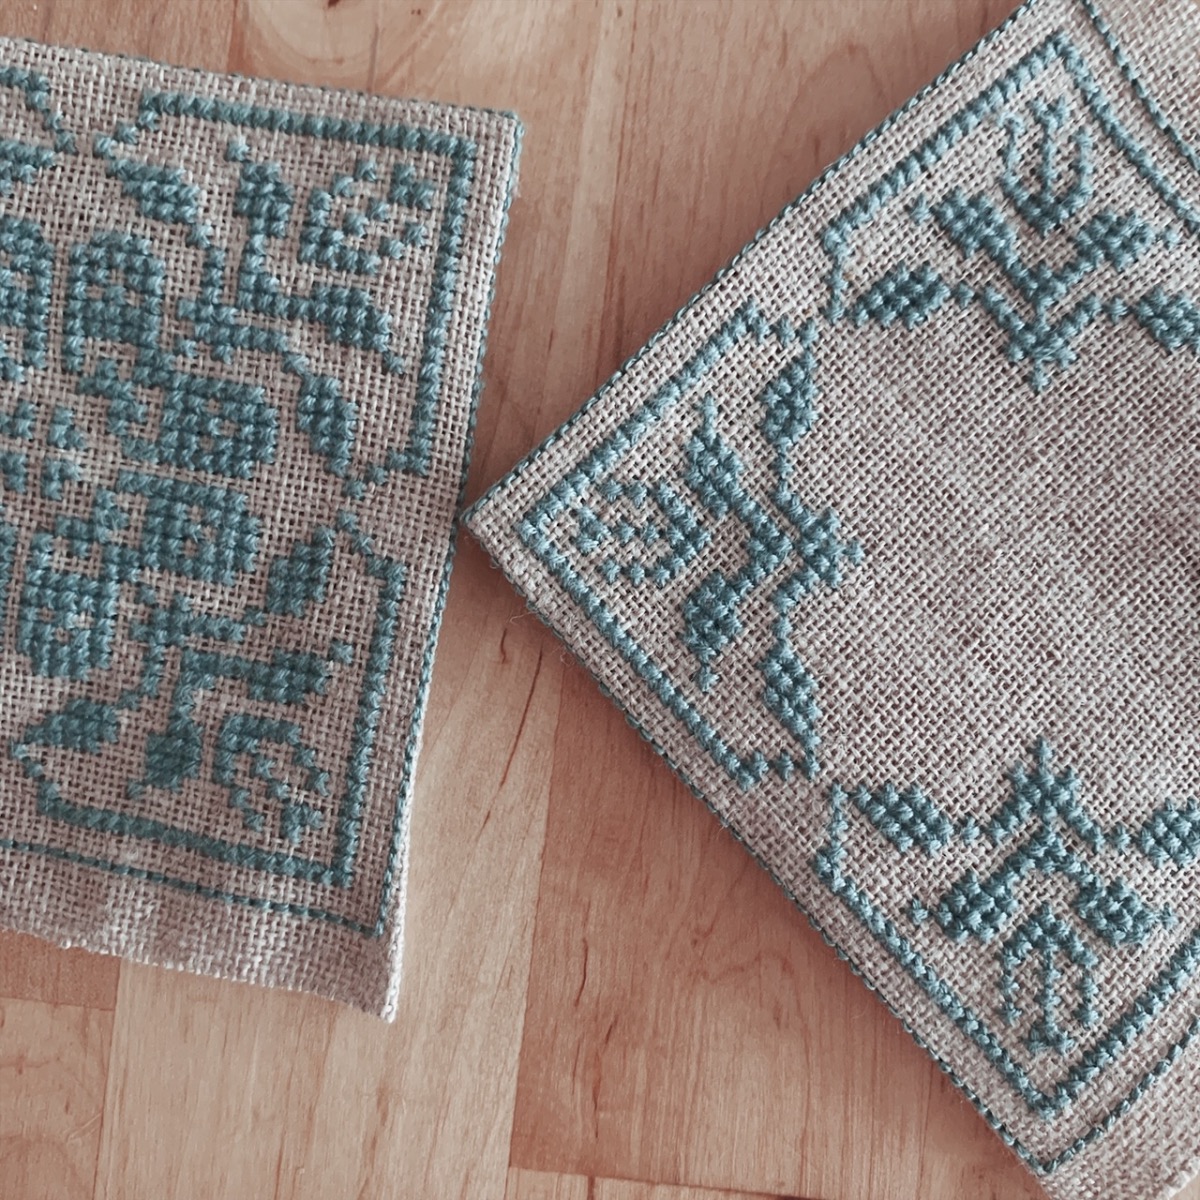
To start, prepare the linen on your embroidery hoop and embroider one side, as per your template. Once that is done, replicate the same motif without the central part, but only the edge, as it will be on the bottom face of your biscornu.
Once your two squares are ready, stitch all around with a backstitch. Secure the threads well, as this step is essential for the success of your biscornu!
We recommend doing this tour with two or three stitches per design (4 or 6 threads), as this edge will be where you join the two faces of the biscornu.
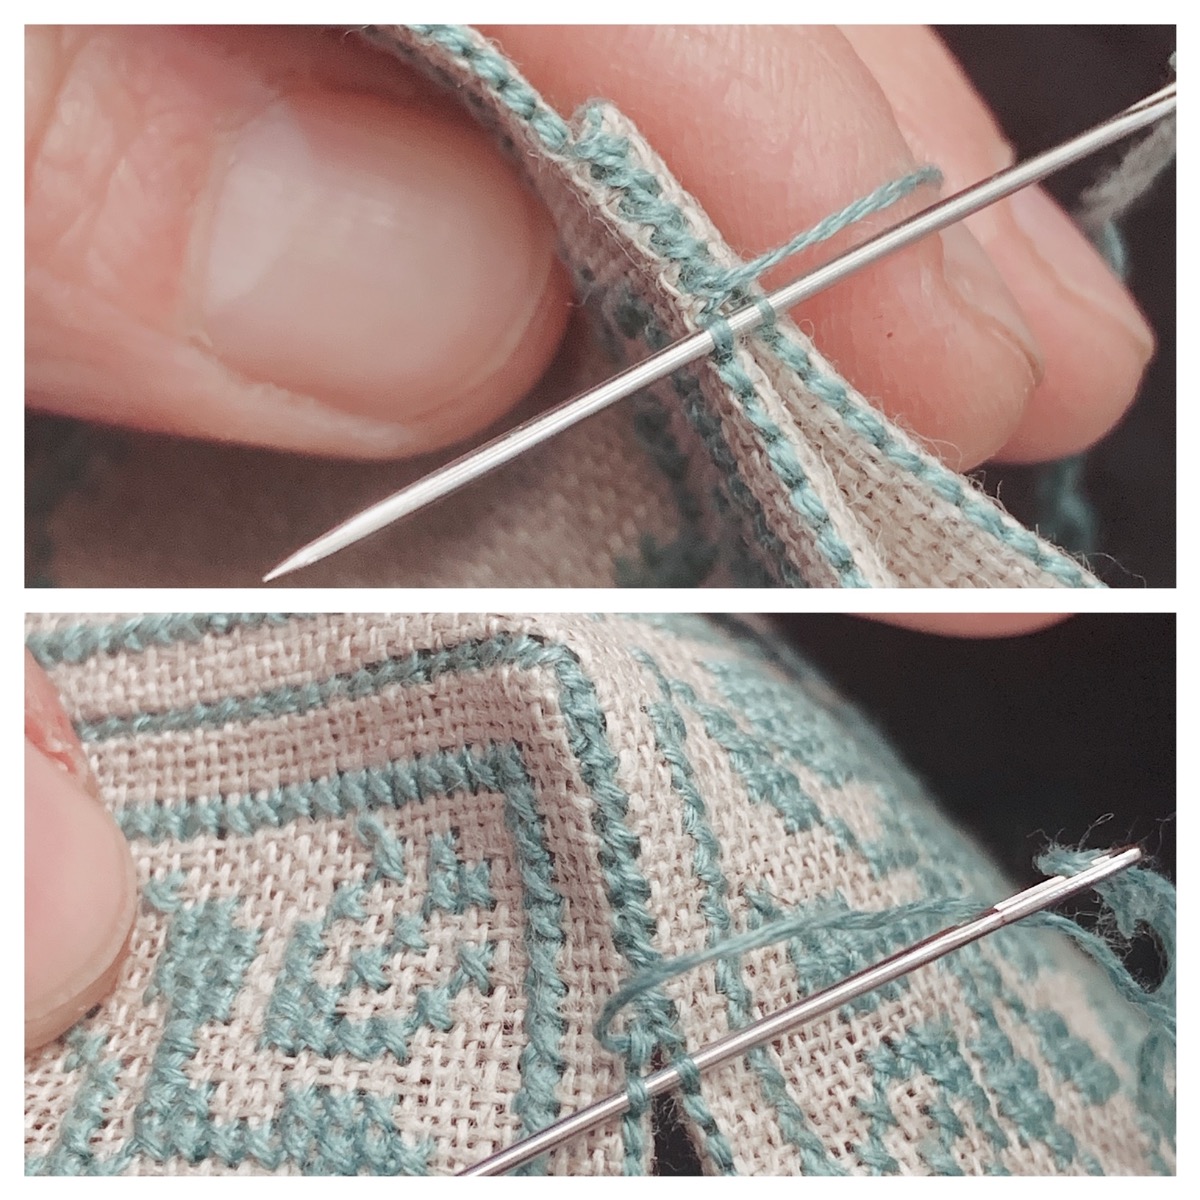
Carefully cut the squares, leaving room for three or 4 stitches (6 or 8 threads), then fold the excess linen inward along your backstitch edge.
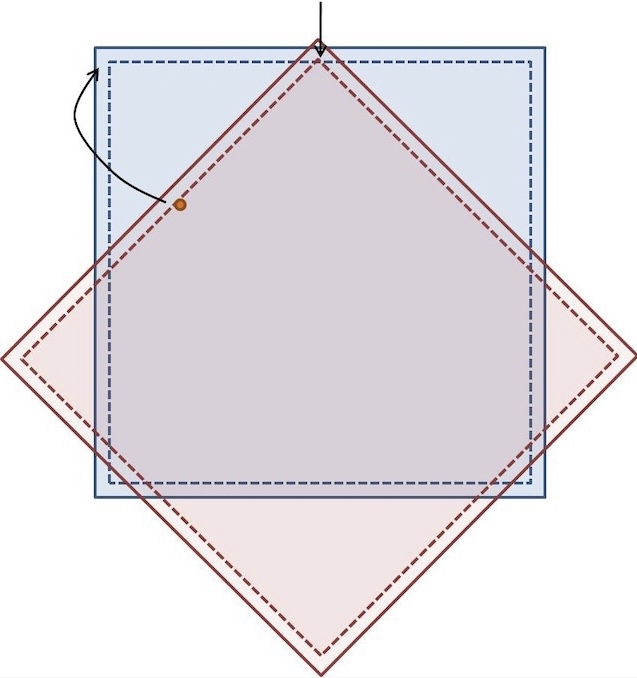
Place the two squares, faces out, folded edges in as indicated in the drawing (and in the photo just above): the tip of one of the faces should be in the middle of the edge of the other face.
Once your squares are well placed, firmly pinch them and pass your needle through the backstitches. Tighten the thread after each stitch, this will give a very nice regular effect. Do not forget any stitches, take your time, the fabric may tend to "twist" at this point, but by working slowly everything will align well. When you reach the first corner, turn the fabric and continue without skipping any backstitch.
As you progress, the biscornu takes shape.
When three-quarters of the way around the biscornu have been completed, and there is only one side left open, start filling your biscornu. Fill it well without compressing too much, you want to give it its typical shape without deforming it. You can complete the round and finish closing the last face of the biscornu!
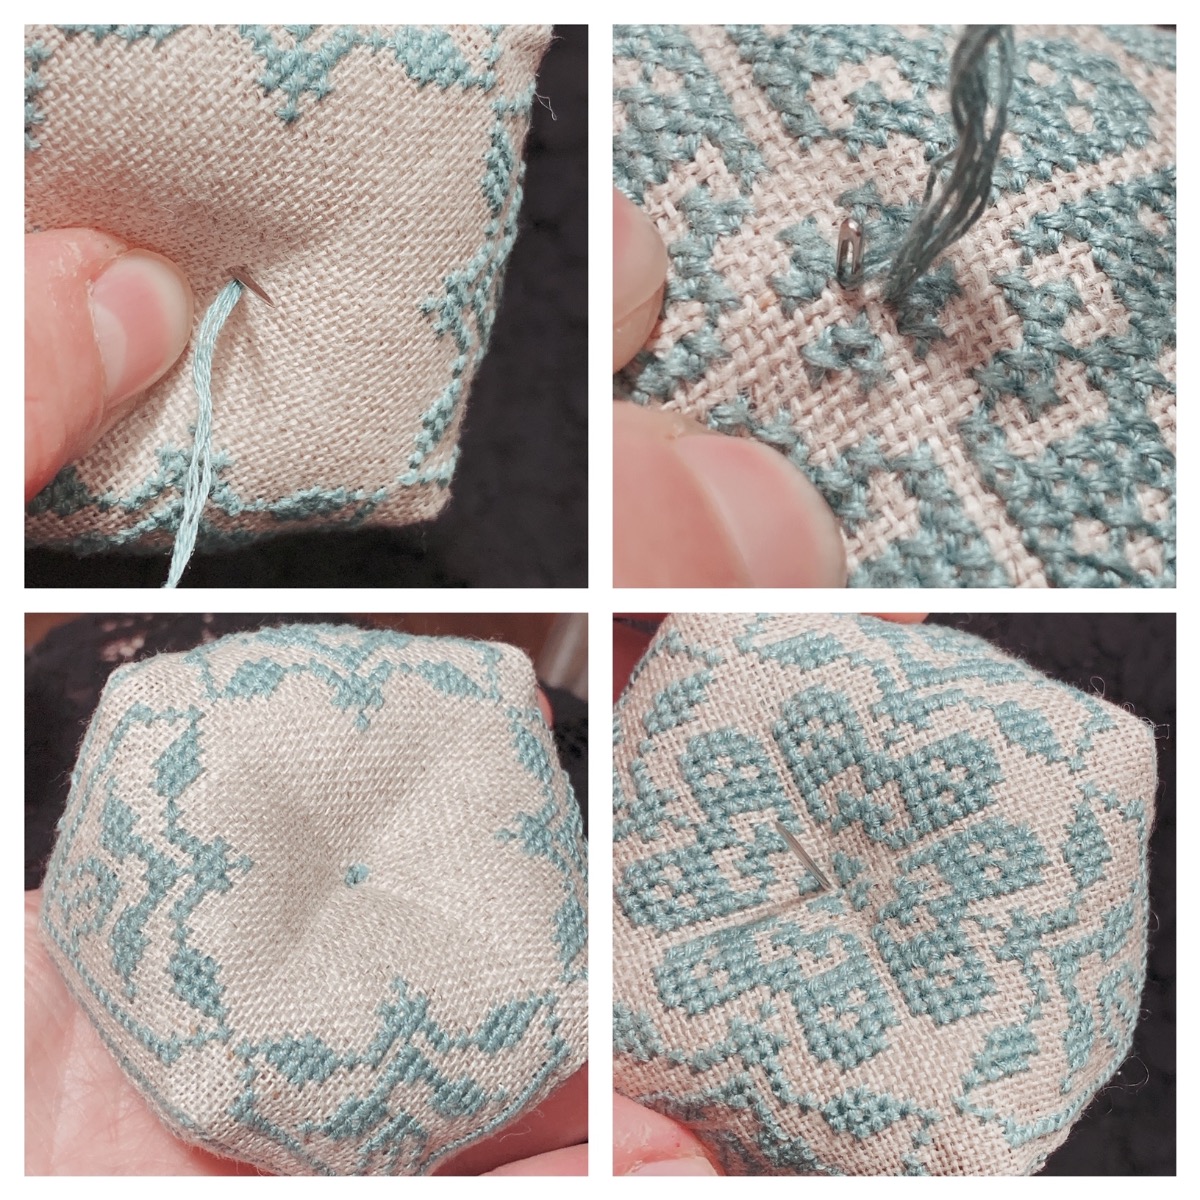
There you go, it's almost done! Prepare a double thread with a knot.
Find the center of the cushion on the bottom face. Pass the needle through to the other side, making sure to aim for the middle without pulling the thread entirely. Make a stitch on the top of the cushion and pass the needle back below. Pass the needle through the thread so that when pulling the thread, the knot stops and fixes in the right place. Repeat twice, remaining very precise, as this is the finishing touch!
Secure the thread, it's done! You have now made your biscornu! If you like, you can hang a small cord at one corner of the biscornu, allowing you to hang it. And why not beads or pompoms on the other side?
What colors do you like? Send us photos of your biscornus: we would be very pleased!
0 Comment(s)
Recent Posts